- H4 Shows Bearish Momentum: Ethereum’s 4-hour chart indicates a bearish market structure with lower highs and lows
- H1 Supply Zone in Play: ETH is reacting to a key supply zone, but liquidity levels below suggest more downside potential
- Liquidity and Risk Management: Watch for price reactions and use stop-loss strategies to manage trades effectively in uncertain market conditions
Ethereum, like most major cryptocurrencies, is navigating through an interesting market structure that offers opportunities—but also risks. Let’s break down what we’re seeing across different timeframes and what traders might want to keep an eye on.
H4 Market Structure: A Bearish Tone
On the 4-hour (H4) chart, Ethereum’s structure is bearish.

The price has been forming lower highs and lower lows, indicating that sellers are currently in control of this timeframe.
This trend highlights that ETH may still have some room to drop, especially if no significant bullish momentum comes in to break the trend.
H1 Supply Zone in Focus
Zooming in on the 1-hour (H1) timeframe, we can see Ethereum reacting at an important supply zone.
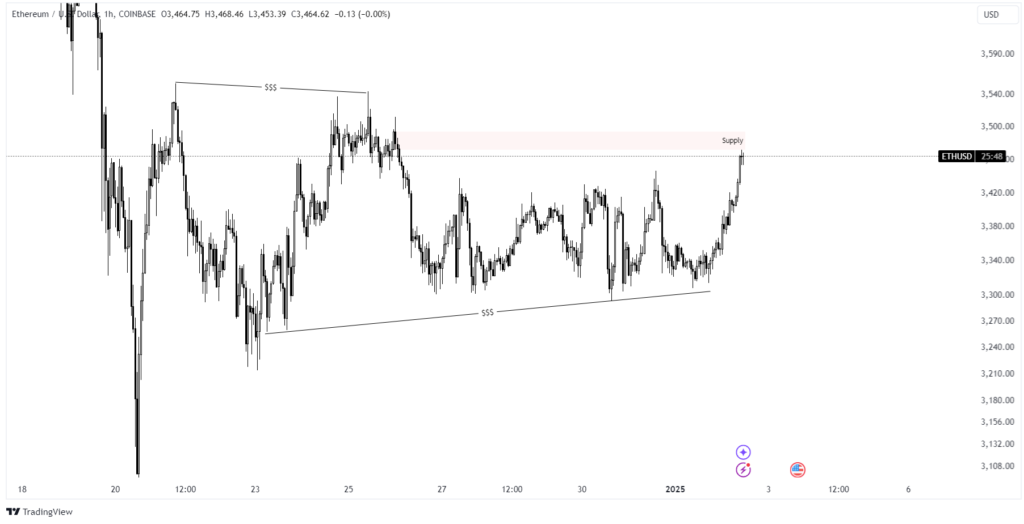
For those unfamiliar, a supply zone is an area where sellers are historically dominant, often triggering a price reversal or a pause in upward momentum.
Currently, Ethereum has reached this key zone, making it an interesting level for those considering short trades.
But here’s the twist: there’s still plenty of liquidity left to grab below the current price levels. Could this be the moment ETH dives to sweep those lower liquidity zones?
What Could Happen Next?
While the analysis presents potential scenarios, let’s remember—markets can do anything. Traders must stay flexible and prepare for either possibility:
- Bearish Scenario: Ethereum could respect the H4 bearish structure, react to the H1 supply zone, and move lower to capture liquidity sitting beneath key levels.
- Bullish Reversal: On the other hand, if ETH breaks through the H1 supply zone and flips it into support, this could signal the beginning of a push higher, invalidating the short-term bearish outlook.
The Importance of Liquidity and Risk Management
Liquidity plays a crucial role here. Large players often target areas of high liquidity to execute their moves, making those zones important for traders to monitor.
As always, ensure proper risk management when trading. Consider moving stop-losses to breakeven if the trade goes in your favor to minimize risk—especially in uncertain market conditions.
Final Thoughts
Ethereum’s current positioning presents a mix of opportunity and uncertainty. While the technicals point to a potential bearish continuation, it’s important to stay adaptive and watch how the price reacts around key levels.
After all, no one knows for certain what the market will do next. The scenarios we outline are simply probabilities—not guarantees.
This analysis is a tool to guide your trading decisions, but it’s no substitute for your own research and strategies. Always trade responsibly.
Disclaimer: The information provided in this article is for informational and educational purposes only and does not constitute financial, investment, or trading advice. Any actions you take based on the information provided are solely at your own risk. We are not responsible for any financial losses, damages, or consequences resulting from your use of this content. Always conduct your own research and consult a qualified financial advisor before making any investment decisions.