- Solana has reacted to a demand zone but faces liquidity both above and below
- Key areas to watch: structure shifts, liquidity grabs, and confirmation signs
- Risk management is key—stay flexible and react to price action
In our previous Solana analysis, we discussed how the price could react at the marked demand zone—and that’s exactly what happened.

For those new to this, a demand zone is an area on the chart where buyers previously stepped in aggressively, causing a price bounce. These zones can often serve as support, offering potential trade setups.
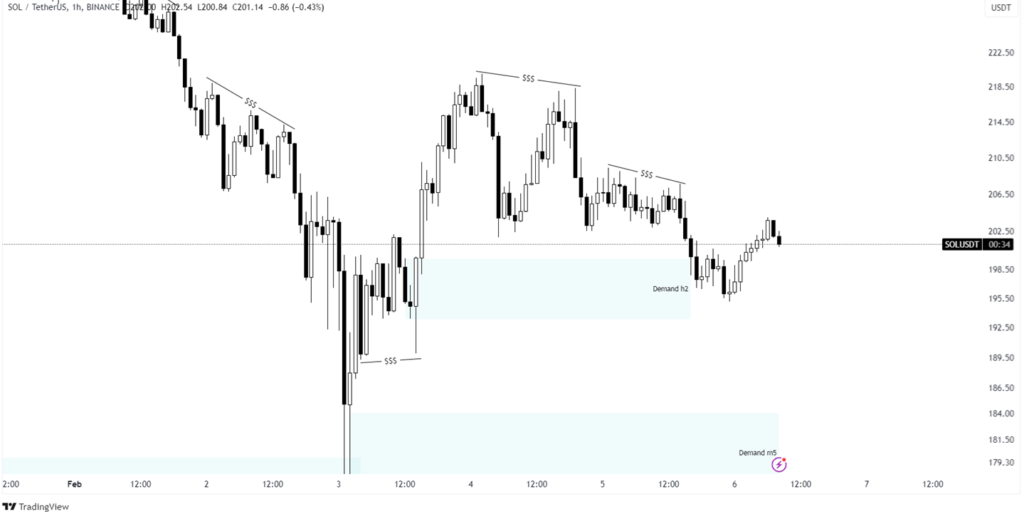
Now that Solana has reacted to the demand zone, what’s next? Let’s break it down.
Current SOL Price Action: Liquidity Everywhere
The reaction at the demand zone was expected, but to be honest, I don’t love this area anymore.
Why? Because there’s liquidity both above and below the current price—which means SOL could grab one before making its next decisive move.

That being said, if I had to choose key zones to watch, I’d focus on the ones I’ve marked.
Monitor them closely—look for signs of liquidity buildup, structure shifts, and key confirmations before making a move.
Possible Scenarios for SOL
- Bullish Scenario: If Solana clears the liquidity above, it could trigger a move toward higher resistance zones before retracing
- Bearish Scenario: If SOL instead goes for the liquidity below, it might retest deeper demand zones before bouncing
- Range-Bound Scenario: There’s also a chance that price consolidates for a while, trapping traders before making a real move
Final Thoughts
Let’s be real: no one knows exactly what Solana will do next. Market movements are often unpredictable, and while we can analyze possibilities, nothing is 100% certain.
The key takeaway? Stay flexible, manage your risk, and adapt to price action as it unfolds.
For those of you who follow my articles regularly—thank you! Wishing you all the best in the world of crypto trading.
Disclaimer: The information provided in this article is for informational and educational purposes only and does not constitute financial, investment, or trading advice. Any actions you take based on the information provided are solely at your own risk. We are not responsible for any financial losses, damages, or consequences resulting from your use of this content. Always conduct your own research and consult a qualified financial advisor before making any investment decisions. Read more