- Liquidity Grab in Play – XRP has taken liquidity on both sides, hinting at a potential big move ahead
- Key Demand Zones & Trade Setups – The last reaction offered a 1:3 risk-reward trade, but will the next zone hold?
- Trendline Liquidity & Confirmation – Watch for a breakout or structure shift on M5 for stronger confirmations
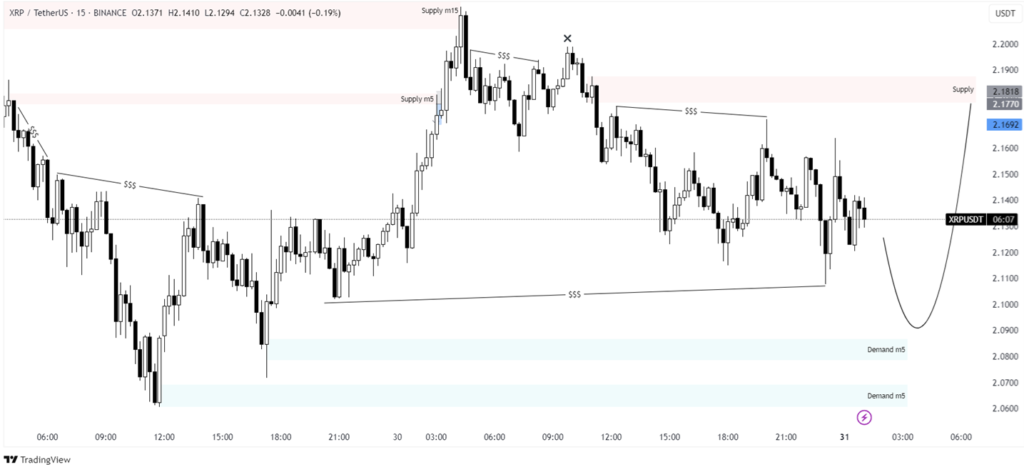
In our last XRP analysis, we discussed how XRP was leaving liquidity both above and below, making a move toward one of the demand zones likely.
What happened next?
It first dipped to grab the liquidity below, reacting strongly at the M5 demand, offering a 1:5 risk-reward trade.
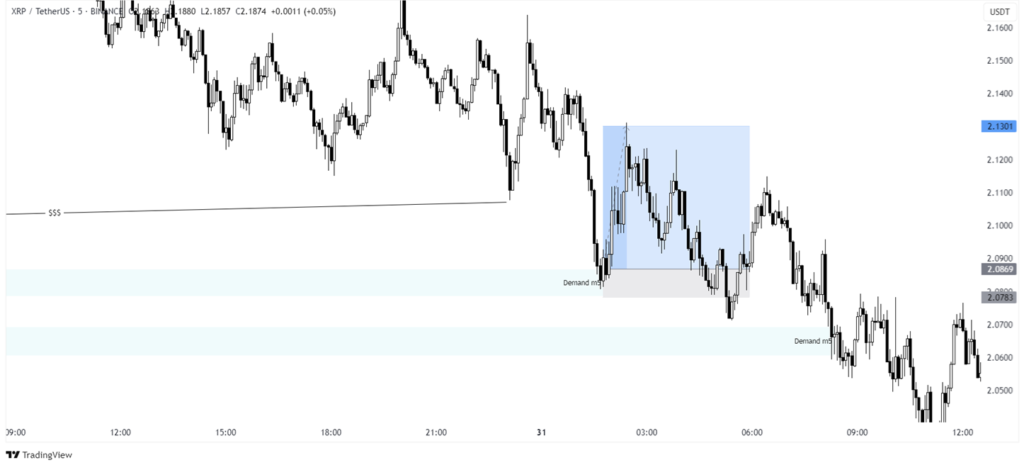
However, the second demand zone didn’t hold, and price broke through. After setting a new low, XRP reversed, reclaiming the liquidity above.
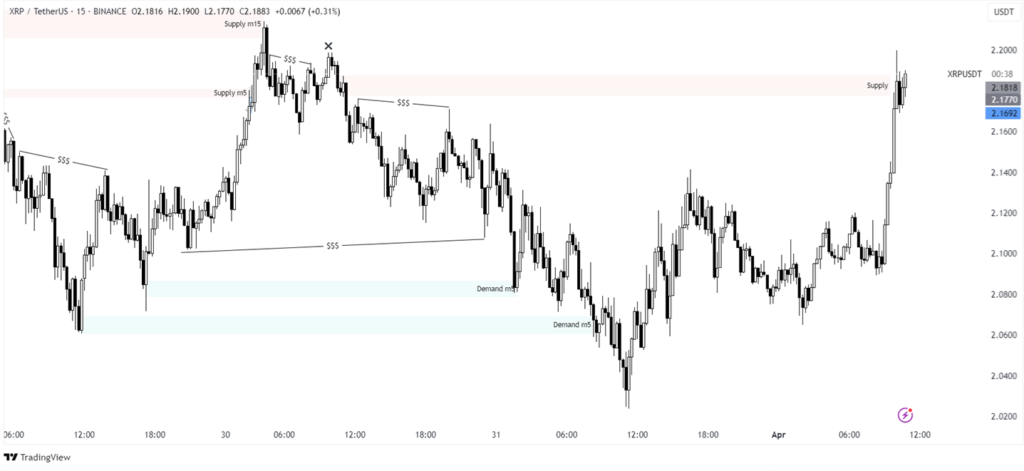
Now, it’s respecting a liquidity trendline on the upside—but how long can that last?
A breakout could lead to an explosive move, but for short positions, I’d wait for an M5 structure shift as confirmation.
Key Factors to Watch in This XRP Analysis
XRP’s Liquidity Grab: What Comes Next?
Liquidity plays a major role in price movement. XRP took liquidity below, then surged to grab liquidity above.
The market thrives on liquidity hunts—understanding where it’s accumulating can give traders an edge.
Demand Zones & Risk-Reward Setups
One M5 demand zone provided a 1:5 risk-reward opportunity, while the second one failed.
This highlights why risk management is crucial—some setups work, others don’t.
Trendline Liquidity: A Trap or a Setup?
XRP is currently following a liquidity-based trendline.
If it breaks, will we see a bullish push, or is it just another liquidity grab before a reversal?

Waiting for lower timeframe structure shifts can help confirm the next move.
Final Thoughts: XRP’s Next Move
No one can predict the market with absolute certainty. Price action is dynamic, and while these scenarios outline possible moves, XRP could still surprise us.
Stay sharp, manage risk, and watch for key confirmations.